Flutter
flutter - Drawer menu 앱 만들기
바차
2021. 7. 19. 23:15
반응형
[최종 코드]
import 'package:flutter/material.dart';
void main(List<String> args) {
runApp(MyApp());
}
class MyApp extends StatelessWidget {
const MyApp({ Key? key }) : super(key: key);
@override
Widget build(BuildContext context) {
return MaterialApp(
debugShowCheckedModeBanner: false,
title: 'AppBar',
theme: ThemeData(
primarySwatch: Colors.red
),
home: MyPage(),
);
}
}
class MyPage extends StatelessWidget {
const MyPage({ Key? key }) : super(key: key);
@override
Widget build(BuildContext context) {
return Scaffold(
appBar: AppBar(
title: Text('Appbar icon menu'),
centerTitle: true,
elevation: 0,
// 메뉴 아이콘을 생성하는 구문//
// leading -> 간단한 위젯이나 icon등을 앱바 타이틀 왼쪽에 배치할 때 사용
// 앱바 말고 다른 곳에서도 자주 사용한다. (listTile)
actions: [ //actions -> 복수의 아이콘 버튼 등을 오른쪽에 배치할 때 사용
IconButton(
icon: Icon(Icons.shopping_cart),
onPressed: () {
print('shopping cart button is clicked');
},
),
IconButton(
icon: Icon(Icons.search),
onPressed: () {
print('search button is clicked');
},
),
],
),
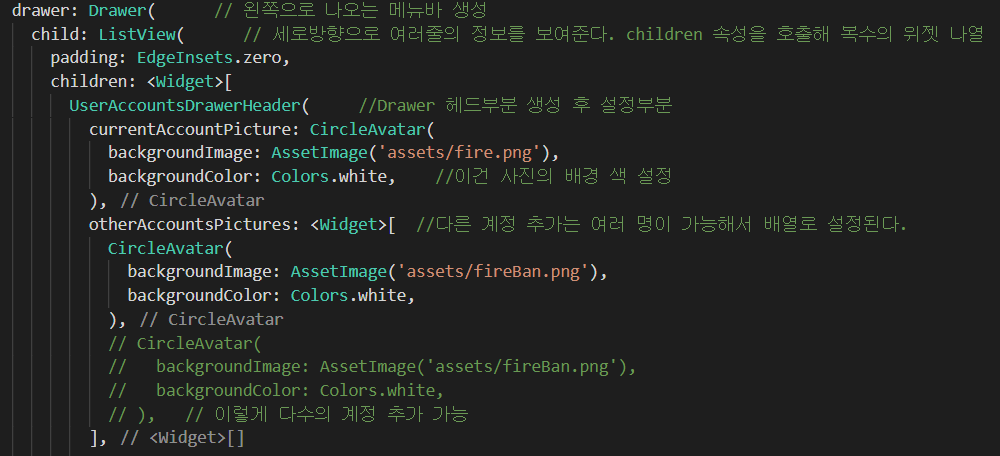
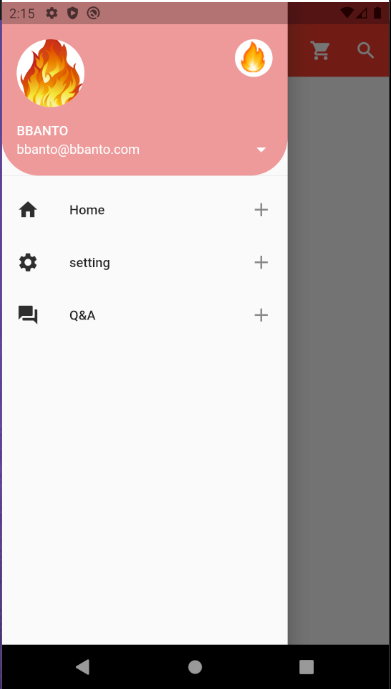
drawer: Drawer( // 왼쪽으로 나오는 메뉴바 생성
// 세로방향으로 여러줄의 정보를 보여준다. children 속성을 호출해 복수의 위젯 나열
child: ListView(
padding: EdgeInsets.zero,
children: <Widget>[
UserAccountsDrawerHeader( //Drawer 헤드부분 생성 후 설정부분
currentAccountPicture: CircleAvatar(
backgroundImage: AssetImage('assets/fire.png'),
backgroundColor: Colors.white, //이건 사진의 배경 색 설정
),
//다른 계정 추가는 여러 명이 가능해서 배열로 설정된다.
otherAccountsPictures: <Widget>[
CircleAvatar(
backgroundImage: AssetImage('assets/fireBan.png'),
backgroundColor: Colors.white,
),
// CircleAvatar(
// backgroundImage: AssetImage('assets/fireBan.png'),
// backgroundColor: Colors.white,
// ), // 이렇게 다수의 계정 추가 가능
],
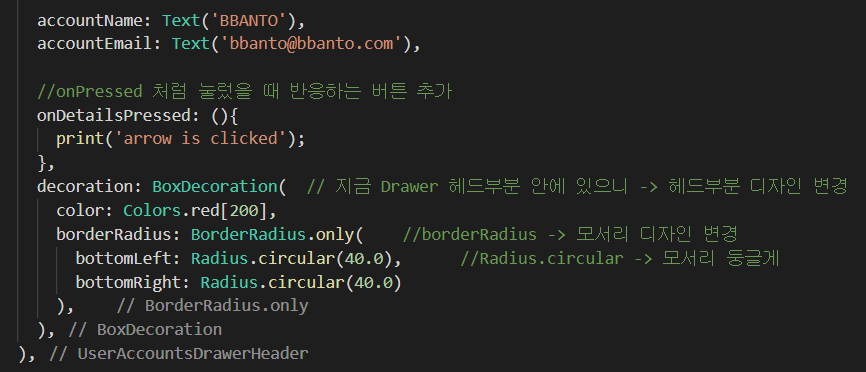
accountName: Text('BBANTO'),
accountEmail: Text('bbanto@bbanto.com'),
//onPressed 처럼 눌렀을 때 반응하는 버튼 추가
onDetailsPressed: (){
print('arrow is clicked');
},
// 지금 Drawer 헤드부분 안에 있으니 -> 헤드부분 디자인 변경
decoration: BoxDecoration(
color: Colors.red[200],
borderRadius: BorderRadius.only( //borderRadius -> 모서리 디자인 변경
bottomLeft: Radius.circular(40.0), //Radius.circular -> 모서리 둥글게
bottomRight: Radius.circular(40.0)
),
),
),
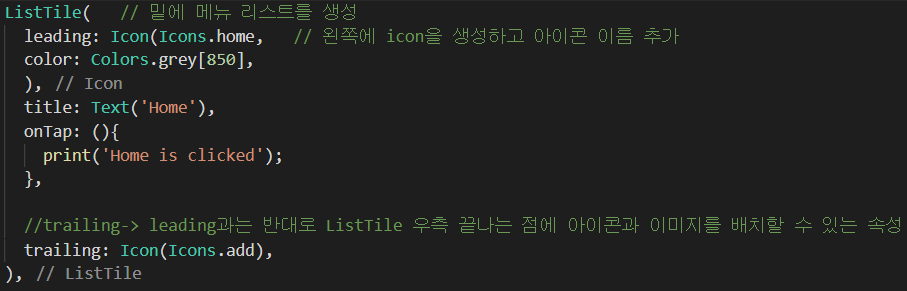
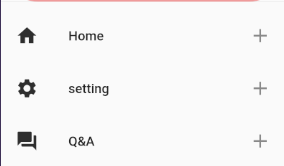
ListTile( // 밑에 메뉴 리스트를 생성
leading: Icon(Icons.home, // 왼쪽에 icon을 생성하고 아이콘 이름 추가
color: Colors.grey[850],
),
title: Text('Home'),
onTap: (){
print('Home is clicked');
},
//trailing-> leading과는 반대로 ListTile 우측 끝나는 점에 아이콘과
//이미지를 배치할 수 있는 속성
trailing: Icon(Icons.add),
),
ListTile(
leading: Icon(Icons.settings,
color: Colors.grey[850],
),
title: Text('setting'),
onTap: (){
print('setting is clicked');
},
trailing: Icon(Icons.add),
),
ListTile(
leading: Icon(Icons.question_answer,
color: Colors.grey[850],
),
title: Text('Q&A'),
onTap: (){
print('Q&A is clicked');
},
trailing: Icon(Icons.add),
),
],
),
),
);
}
}
[Drawer]
[UserAccountsDrawerHeader]

-> UserAccountsDrawerHeader 위젯을 ctrl + 클릭을 통해 보면 이렇게 required 가 붙은 두 속성이 나온다.
-> required 붙은 속성은 반드시 작성해줘야 하는 부분을 뜻한다.

[Text 추가 및 decoration]

[textTile]
x 3
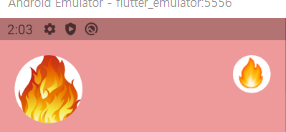
[결과 화면]
300x250